| Daily or Before Starting Engine |
|
| Every 25 Hours |
|
| Every 50 Hours |
|
| Every 200 Hours |
|
| Every 250 Hours |
|
| Annually or Every 500 Hours |
|
| Every 1000 hours or yearly |
|
| Every 1500 Hours |
|
Engine
Check Oil Level
The importance of checking and maintaining the proper oil level in the crankcase cannot be overemphasized. Check oil BEFORE EACH USE as follows:
- Make sure the engine is stopped, level, and is cool so the oil has had time to drain into the sump.
- To keep dirt, debris, etc., out of the engine, clean the area around the dipstick before removing it.
- Remove the dipstick; wipe oil off. Reinsert the dipstick into the tube and press all the way down.
- Remove the dipstick and check the oil level.
- If the level is low, add oil of the proper type, up to the full mark on the dipstick. (Refer to “Oil Type” on page 5 of the Kohler manual.) Always check the level with the dipstick before adding more oil.
Oil change
Change oil after every 50 hours of use. Change oil while the engine is still warm. Make the engine level while changing and checking the oil.
- To keep the dirt out, clean the area around the oil fill cap and the dipstick
- Remove the plug from the oil drain hose on the left side and put in container to catch the used oil
- Wipe area around the filter to remove dirt
- Place a rag under the filter to catch any spilled oil and remove the filter
- Wipe oil on new filter gasket and install new filter tighten 2/3 to 1 turn after it contact the surface.
- Replace plug and refill oil to proper level.
Filters
- Air filter– removes air filter cover and remove air filter, if the filter or precleaner are dirty replace.
- Water hose filter– inspect clean if needed
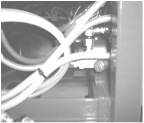
- Y-strainer filter– remove y-strainer clean if dirty replace if torn (see fig. a pg 12)
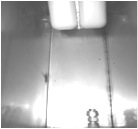
- Bypass jet assembly – remove jet filter assembly from water box open assembly clean jet and filter (see fig. b pg. 12)
- Water pump inlet filter – inspect clean if needed
|
Fig A – y-strainer |
Fig B – bypass jet assembly – water box |
|
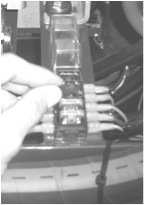
Fig C – fuse # 3 removal |
Descaling should only be done when needed. It is recommend by Chem-Tex to use a water softener to reduce hard water deposits. It will greatly reduce the amount of descaling needed if a water softener is use in conjunction with the panther truckmount. A suitable water softener can be purchased from Chem-Tex a low cost.
Watch for scalingwhen cleaning water bypass jet and filter in waterbox.
If the Panther Truckmount needs descaling, use Chem-Tex Truckmount Descaler.
- Empty entire container of Chem-Tex Descaler into water box.
- Set Temp control to 200 deg.
- Start truckmount and allow to idle for 5 min.
- Lower temp to 80 deg. Run 1 min
- Shut off the truckmount, wait 10 min.
- Use bleeder hose or tool to remove Descaler from the unit and dispose of properly.
- Pour in 1 cup of Supreme carpet detergent in waterbox. Allow idling for 5 min.
- Remove using bleeder hose or tool.
- Allow truckmount to flow fresh water through until all Supreme and Descaler is removed.
Fresh water tank users***
If control solenoid is hooked to fresh water tank, The tank must be rinsed using Supreme to insure no descaler is left in tank.
Note: removing fuse #3 will allow truckmount be run without water hooked.(see pg. 12 fig. C) up be sure to not run water box empty or water pump will be damaged.
Winterizing Too prevent freezing, anti-freeze must be added to the water box.
- Remove the third fuse (see pg 12 fig. C.) To disable water pressure sensor.
- With out water supply run truckmount to empty waterbox 2/3 of the way down.
- Add 1 gallon of anti-freeze to water box and allow to run 2 or 3 min.
- Spray tool or open bleeder until anti-freeze comes out.
- Truck mount is now safe from freeze.
- To remove drain anti-freeze through tool or bleeder hose.
- Allow fresh water to flow and clean out any traces of anti-freeze.
- Replace the fuse that was removed.
Fresh water tank users***
If control solenoid is hooked to fresh water tank, The tank must be rinsed using Supreme to insure no Anti-Freeze is left in tank.
Note: removing fuse #3 will allow Unit be run without water hooked.(see pg. 12 fig. C) up be sure to not run water box empty or water pump will be damaged.


